The release of Windows 10 has brought a lot of changes in its displays and performances. Along with the new appearance, there are also some new and cool features. For example, you can now surf the Internet with its new browser Edge and record screen with its Game DVR. If you are willing to show things you’ve discovered on this new operating system, screenshots will be of great help. Also, if you need to ask for troubleshooting, show steps of using an application or collect images for articles about Windows 10, screenshots are always the best way for you. Therefore, this article gives you several methods on how to take screenshot on Windows 10.
- 1. Make use of Screenshot Tool
- 2. Use key combinations
- 3. Utilize Windows Bundled Utility
- 4. Use Microsoft Snip
Easy Ways to Screenshot on Windows 10
1
Apowersoft Free Screen Capture
![]() This is a free online screenshot application. It is capable of capturing full screen, active window and particular region of the screen. It also provides a delay time option for capturing drop-down menus or tooltips, then you can set a delay time in its “Options”. Apart from taking screenshot, this tool also provides a quick image editor for you to annotate the screenshot with arrows, lines, and texts. You can also use its blur feature to cover private or sensitive info on the screenshot. What’s more, when the screenshot is done, this tool allows you to copy, save, email, upload or share it directly.
This is a free online screenshot application. It is capable of capturing full screen, active window and particular region of the screen. It also provides a delay time option for capturing drop-down menus or tooltips, then you can set a delay time in its “Options”. Apart from taking screenshot, this tool also provides a quick image editor for you to annotate the screenshot with arrows, lines, and texts. You can also use its blur feature to cover private or sensitive info on the screenshot. What’s more, when the screenshot is done, this tool allows you to copy, save, email, upload or share it directly.
Follow the steps below to learn how to take a screenshot on Windows 10 with this tool.
- Go to the page of this application. Click “Launch Application” button, run Java applet to load this application. Wait a few seconds until its interface pops up.
- Display what you want to screenshot on the screen.
- Click the screenshot tool and hit the camera icon on its interface. You mouse cursor will turn into a blue crosshair. Click, hold and drag your mouse to capture a region on the screen and then release the mouse to confirm it.
- You will see blue frame around the captured region with two toolbars on two sides. Make use of the annotation tools on the horizontal bar.
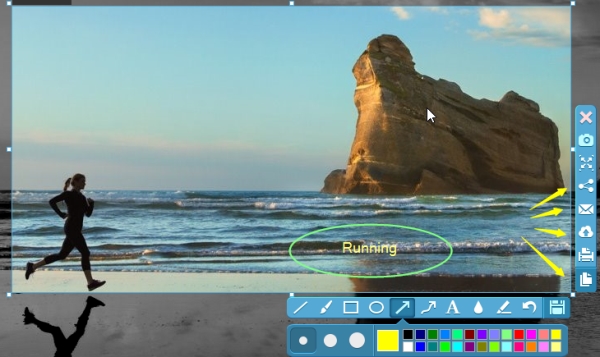
- Lastly, click the disk-like icon to save the screenshot on your PC. Alternatively, you can also copy it to the clipboard or upload it to the free cloud space provided by the developer by clicking the corresponsive buttons on the vertical bar.
This application has a pro version which comes with more than 10 screenshot modes, allowing you to capture not only visible things on the screen, but also the contents beyond the screen in a scrolling window. In addition to that, it also has a Task scheduler for you to take screenshots automatically and a Screen recorder for making screencasts by yourself. Try it now by clicking the button below.
2
Win + Print Screen Key Combination
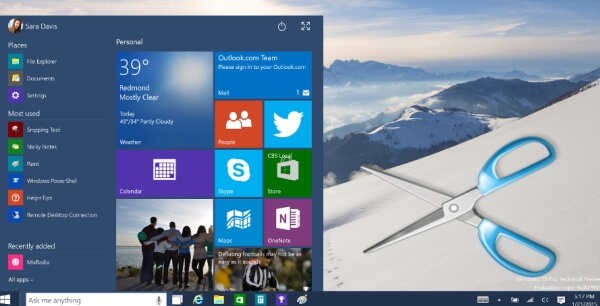
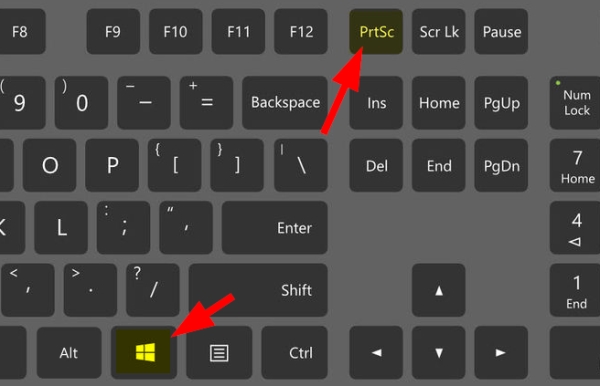
There is a simple and fast way to screenshot Windows 10. Just press the “Win + Print Screen” key combo. After that, your screen will dim for a moment, and you can then find the screenshot in the “Screenshots” folder under the “Pictures” library. In some cases, the screenshot may also be copied to the clipboard, so you can’t find the “Screenshots” folder in “Pictures” library. Open Paint (input “Paint” in the search box) and paste the screenshot on its blank board, hit “Save” to keep it as an image file on your PC. However, this way only enables you to capture the full screen. And if you want to crop or annotate the screenshot, you have to turn to another accessory application like Paint.
3
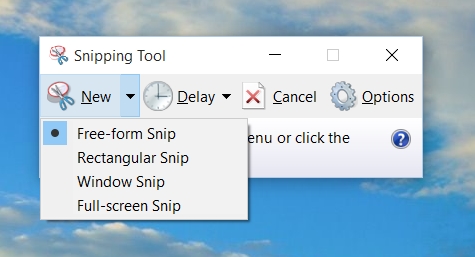
Snipping Tool
This utility is bundled with Windows 7/8/10. It has four screenshot modes for you to screenshot on Windows 10: Free-form Snip, Rectangular Snip, Window Snip and Full-screen Snip. And there is also a very simple image editor for you to edit the screenshot once you’ve taken it. It is worth mention that a new feature is added to this tool in Windows 10. It gives you 1-5 seconds delay in capturing screen. With this feature, you can screenshot pop-up or drop down menus and tooltips.
4
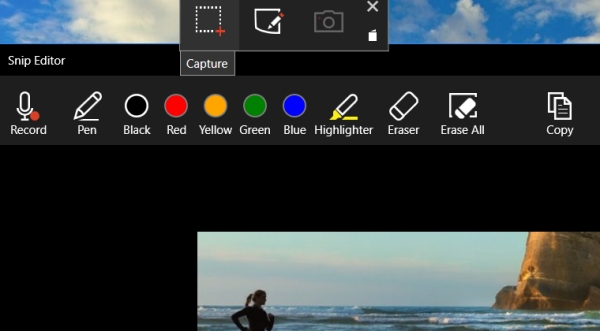
Snip
This is a new screen capture tool developed by Microsoft. It can be installed on any version of Windows. It allows you to capture anything visible on the screen and provides simple editing options like Snipping Tool does. However, it is superior to Snipping Tool in that it has a screen recorder function. You can record your activities in the drawing board of this application.
Conclusion
This post provides several practical ways on how to screenshot on Windows 10. If you need more annotation options or instant uploading and sharing functions, Apowersoft Free Screen Capture is undoubtedly than other tools. And if you want to take automatic screenshots or record screen, then its pro version is the best choice. Click the download button below to give it shot.

Leave a Comment