 With the release of iPad, people who were looking for a portable device to carry along the music, video, games and more could have their dream come true. While using iPads, they may want to make a video to share their achievements in games or some amazing tricks they found in some apps. But most of them have no ideas about how to record iPad screen. In this article, there’ll be three methods recommended for recording iPad screen.
1. Recommended method – Apowersoft iPhone/iPad Recorder
3. Feasible app – Display Recorder
Method 1: Utilizing Apowersoft iPhone/iPad recorder
When it comes to screen recording on iPad, most advanced users would like to utilize Apowersoft iPhone/iPad Recorder for its great performance as well as considerate features. With this program, you can not only record video on iPad but also project your mobile screen on the computer display. Moreover, different sound sources from system and microphone are optional for recording. Instead of troublesome connection by lightning cable, just keep the iPad and your PC under the same Wi-Fi environment and they two will get connected smoothly. Here are steps on how to record iPad.
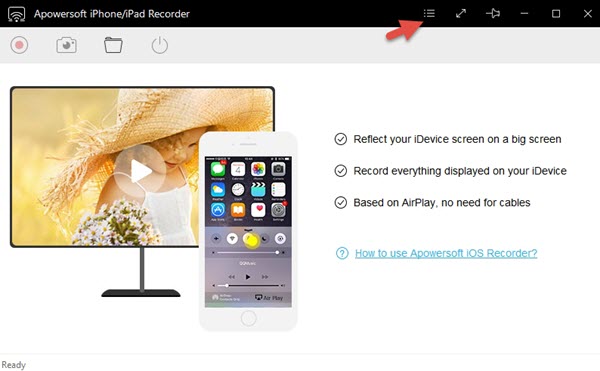
- Click the button below and download Apowersoft iPhone/iPad Recorder. Launch it on your computer after installation.
- As soon as its interface comes out, find options menu at the top and configure the settings like audio inputs as well as output formats.
- On your phone, just open the control center and tab the “AirPlay”. On seeing a TV-like icon, tab it and turn on the mirror option.
- Then go back to the recorder window, just click on the record button and it will start recording your iPad screen immediately.
- During recording process, you are free to show anything that you want to record.
- Once done, just click the stop button and check your video file on PC.

What’s more, video will be saved in good quality and there are multiple formats for you to choose. You can also take screenshots as many as you like.
Method 2: Using QuickTime
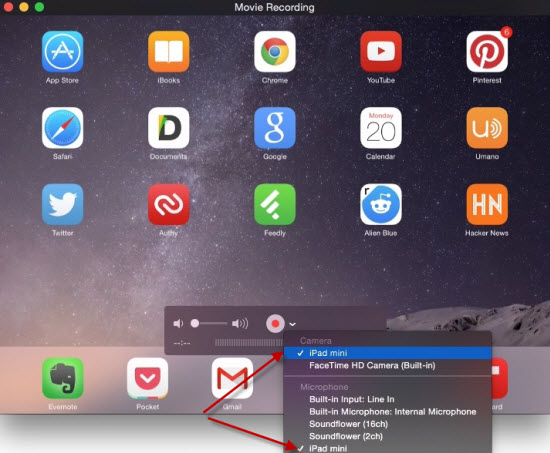
QuickTime is a powerful media player that works well on Mac and PC. Note that it is also capable of recording your screen aside from playing videos and audios. As for how to make use of this application, you can learn from the following instructions:
Firstly, connect your iPad to Mac via USB cable then launch QuickTime. Secondly, Click “File” on the top of QuickTime interface and choose “New Movie Recording”. Next, a recording window would pop up, click the little arrow on it and select your iPad from the drop-down menu. Last, press “Record” button and you can start to record screen on iPad. Click “Stop” button to finish recording and save the video to local drive of Mac.
Unfortunately, the recorded video can only be saved as MOV file, which cannot be played on non-Apple device and inconvenient to share. If you’re working with Windows, MOV videos cannot be played on your system properly as well. For this case, the upcoming method can make up this disadvantage.
Method 3: Display Recorder
The last screen recorder for iPad is Display Recorder which supports recording iPad screen directly without connecting to PC. Its built-in YouTube uploader is also workable for quick sharing. However, it requires the users to jailbreak their devices in advance. You can make use of this app, if you have performed jailbreak on your devices, please try other solutions otherwise. Plus, please note that Display Recorder is not available in App Store, it is only available in Cydia Store. Here’re the detailed operation steps.
- Download and install Display Recorder from Cydia Store which costs $4.99.
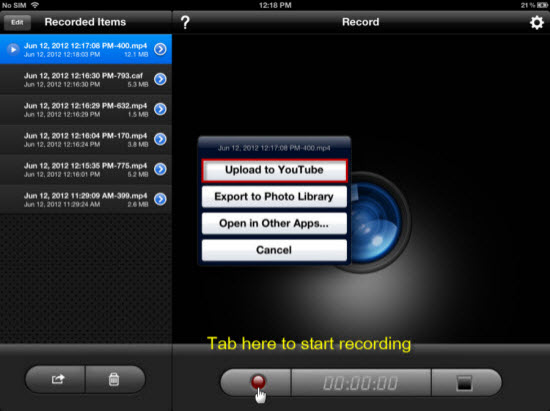
- Open Display Recorder and set the desired output type (video, audio or the both).
- Press “Record” button and go back to Home Screen. (When it begins to work, you will see a “Red Display Recorder bar” at the top of iPad.)
- Return to Display Recorder and press “Stop” button if recording is over.
- (Optional) Tap the video in the task list and choose the option of “Share and Upload to YouTube”, the video would be soon uploaded to YouTube.
Conclusion:
All mentioned above are awesome screen recorders for iPad. For Mac users, QuickTime would be the default choice. However, it would be a sort of annoying for the unpopular media format which isn’t supported by most of devices. Although, Display Recorder is the most convenient one, some people are still reluctant to take risk to perform jailbreak on their iPads. Viewing these three methods generally, Apowersoft iPhone/iPad Recorder shall be the best program for recording iPad screen in terms of functionality and security.

Leave a Comment