Want a screen recorder that can help you record screen activities on your computer without any time limitation, without watermark, with good audio quality and no lag? Apowersoft Free Online Screen Recorder, a lightweight web-based tool, can fulfill your needs perfectly. It has a very intuitive interface and supports recording video along with audio from system sound and microphone. To help you get started with this free application quickly, we would like to share the guide of using it with you here.
How to Use Apowersoft Free Online Screen Recorder
Preparation
You just need to prepare a computer that can access to internet successfully and a web browser for visiting the application.
Launch application
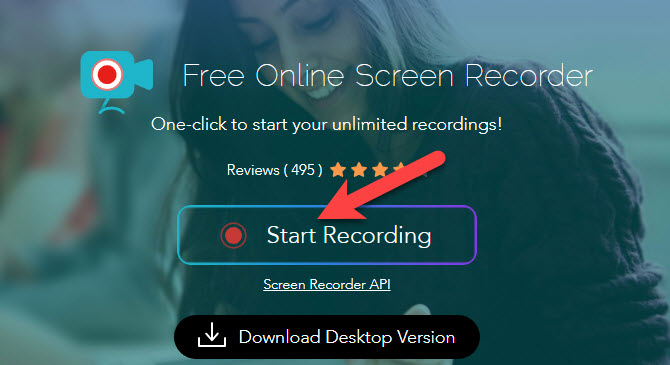
Go to visit Apowersoft Free Online Screen Recorder and click “Start Recording” on the middle of page to launch this application.
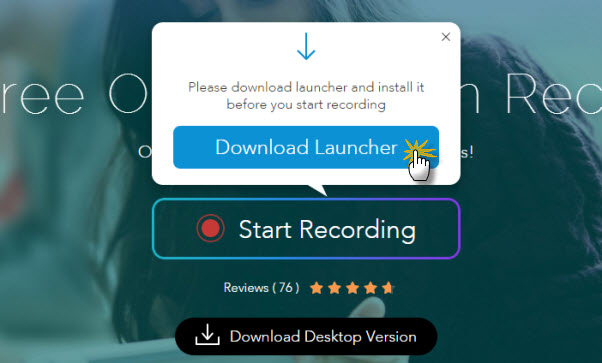
Tips: If you are the first time to use the tool, please click “Download Launcher” button after hitting the “Start Recording” button. (This launcher is quite safe, you don’t need to worry about the security.) Then wait a few seconds till the download completes, and install this launcher. Only by installing the launcher once, you can launch the application to record whenever you want to.
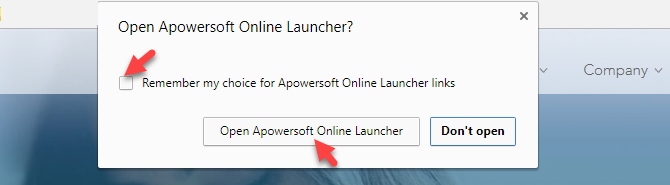
After that, go back to the webpage, then you will see a prompt for opening Apowersoft Online Launcher. Please check the option: “remember my choice for apowersoft online launcher links” and click “open Apowersoft Online Launcher”.
Configure Settings (Optional)
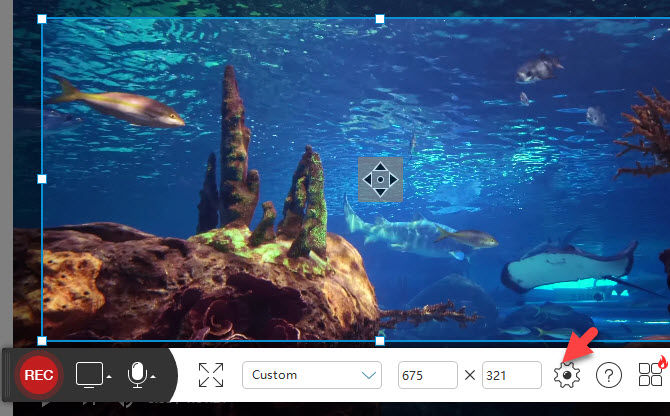
Now the online tool is launched successfully on your computer. Please click “Settings” icon on the toolbar to make settings before you start recording.
- General: you can set up the keyboard shortcuts for start recording, stop recording, pause/resume recording and show/hide recording toolbar. According to your needs, you are allowed to set the default output directory.

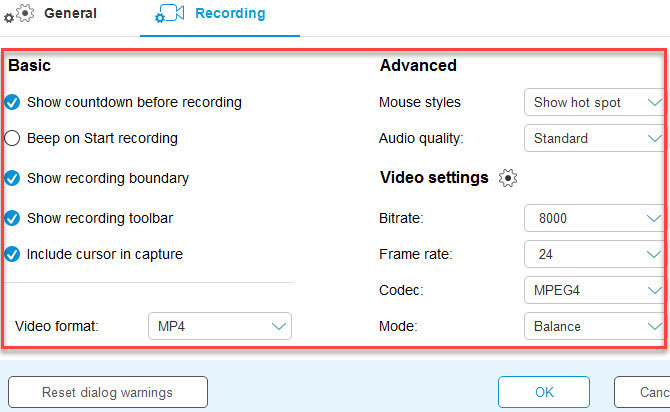
- Recording: just as the picture shows below, you may choose whether to show recording boundary or toolbar, video formats like MP4, WMV, AVI, MOV, FLV, etc, mouse styles, audio quality, bitrate, mode, frame rate, etc. After making settings, click “OK”.


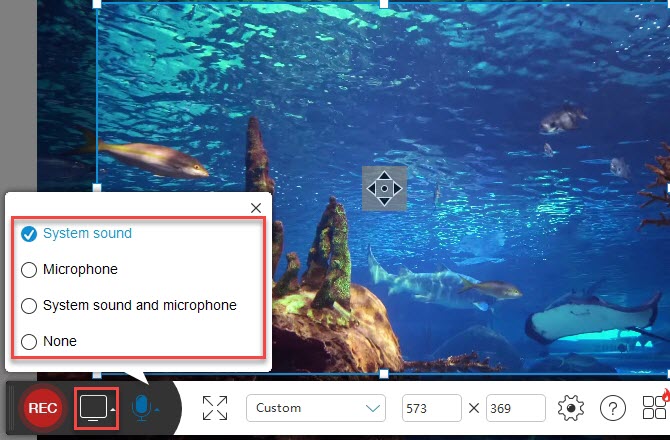
Then you can customize the region you desire to capture and select an audio input source for recording. From the audio input menu, you can choose to record audio from system sound, microphone, both or none of them.
Start recording
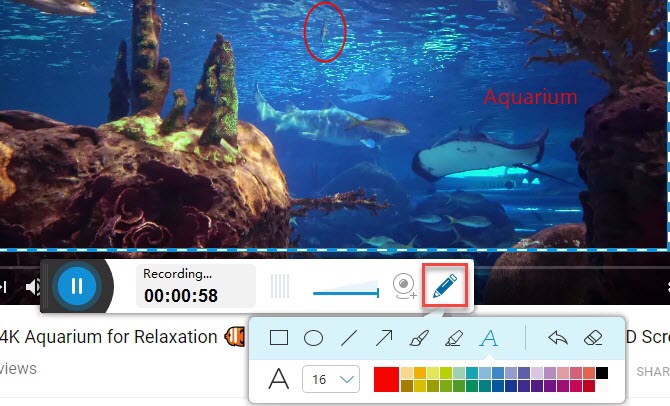
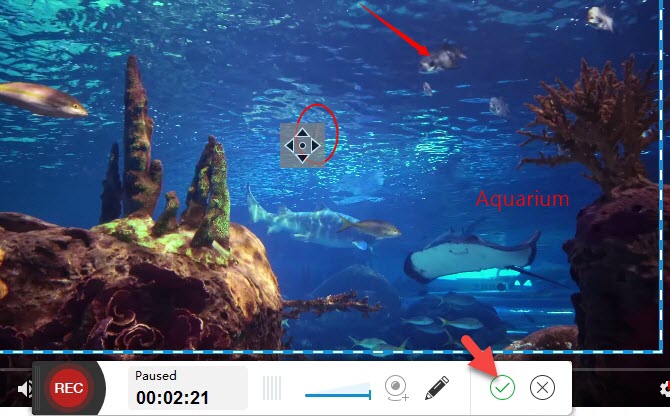
Now, you can start your unlimited recording by clicking the red “REC” button. While recording, click the “Edit” icon, then you will see a few useful editing options like text, highlight, lines, arrows and others are provided with this online screen recorder. You can use them to make your recorded video more vivid.
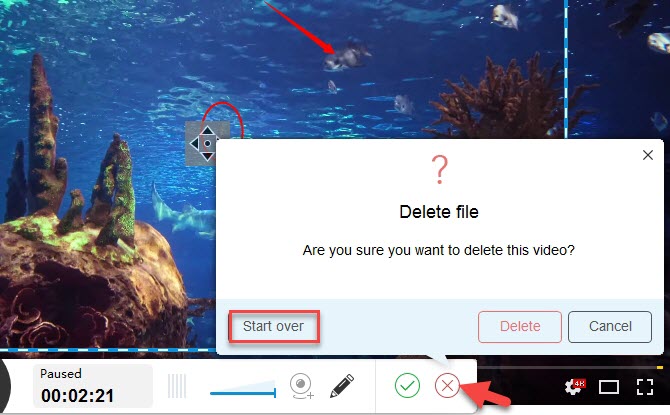
If you want to redo this recording, then you can click “Pause” button then hit the “Cross” button on the right. Then a reminder will pop up, you can hit “Start over” to begin a new recording. While, if you hit “Delete” button, this screen recorder will be shut down, and what you have recorded will not be saved.
Stop recording
Whenever you want to stop recording and save what you have captured, simply hit the blue “Pause” button and click the green “Check” mark to finish it. Then you can preview what you have recorded with the built-in media player.
Save, share or edit video
To save or share this video, just hit the “Save” button on the lower right of the media player and choose to save as video or GIF file, edit video or upload to sites like YouTube, Dropbox, Vimeo, etc. Upon saving video to your local disk, you can select to “Save as Video File”, then choose your desirable output format, video name and output directory. Once it’s done, you can open the folder where you save this screencast.
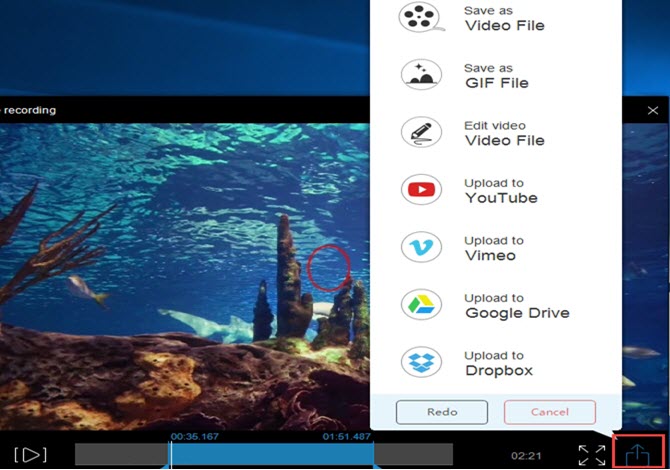
In case that you are not satisfied with the recording, you can hit the “Redo” button to start your new screencast.
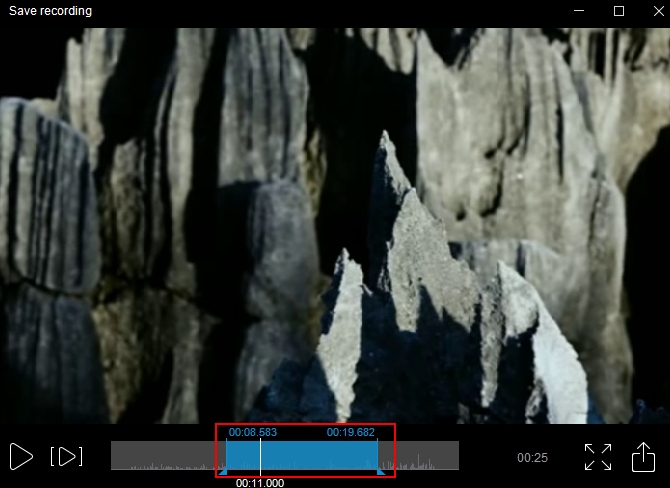
Tips: As you’d expected, this recorder also has the ability to trim video for saving only part of the recording. To do this trick, you can drag and drop the start, end point on the time line, the clip you have selected will turn blue.
Above are the steps about Apoweresoft Free Online Screen Recorder guide, if you prefer a more stable and powerful screen recording program, then you can download and use its pro version. Aside from all the features that provides by the above screen recorder, the desktop version also allows you to create schedule tasks for recording, take screenshots, record with more modes and many more.

Leave a Comment