
ApowerRecover is a data recovery program that can help you get your lost files back from hard drives. There are many scenarios in which you may lose your data: deleting files accidentally, formatting mistakes, or operating improperly. Follow this guide for ApowerRecover, and you can easily restore your precious data without learning any special technical knowledge.
Tips on How to Use ApowerRecover
Get Started
Click the button below to install this software on your computer and run it.
Search for Lost Files
When you open the program, you will see several options divided into three categories: “All Files”, “Media Files” and “Documents, Archives & Emails”. If you need to recover all your files, you can check “All Data”. If not, just click the box beside the specific kind of files you need to recover. You can choose one or multiple types.

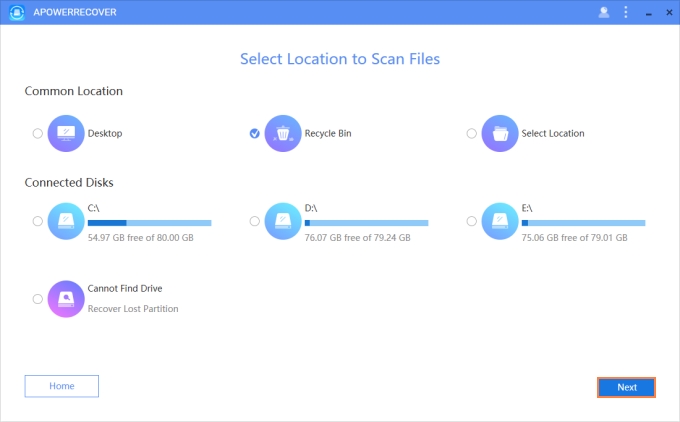
After this, click “Next” to continue. You will need to select a location that you want the program to scan and search for your lost data. The application sorts the choices into “Common Location” and “Connected Disks”.
Common Location
Desktop and recycle bin are the most common places people choose. You can also click “Select Location” and navigate to a specific place on your computer to scan.
Connected Disks
Searching for lost files in drives or other portable devices is possible as well. You can choose “C”, “D” or “E” drive to recover files from PC directly. If you want to recover data from a memory card, camera or other devices, you need to connect it to PC first. It will then be displayed under “Connected Disks” tab. Select a device and click “Next”. The application will start searching automatically.
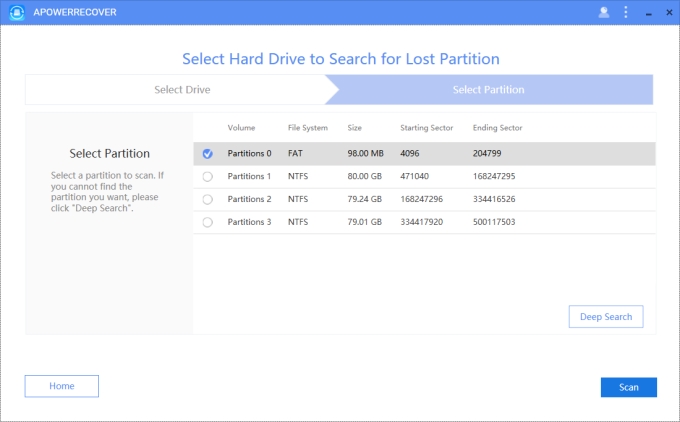
You may encounter a situation in which you cannot find your drive from the places shown above. Here is another option for you. Choose “Cannot Find Drive” > Select a drive > “Search”. If you find the partition you want, select a partition and click “Scan”. But if you cannot find the one you want, choose “Deep Search” and select a partition to scan.
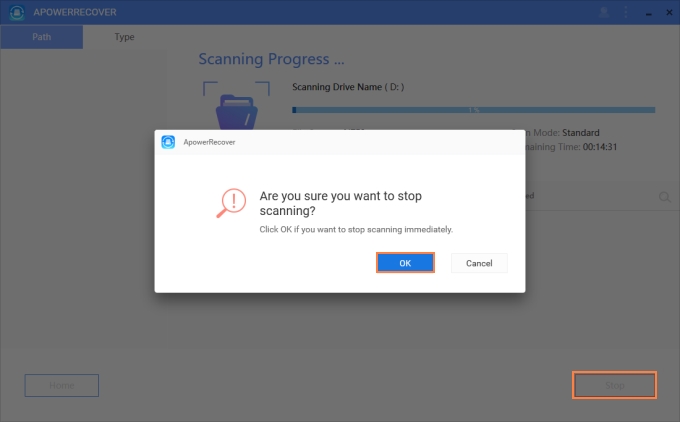
Tip: During the searching process, you can click “Stop” at any time and when a prompt pops up, click “OK” to confirm your decision.
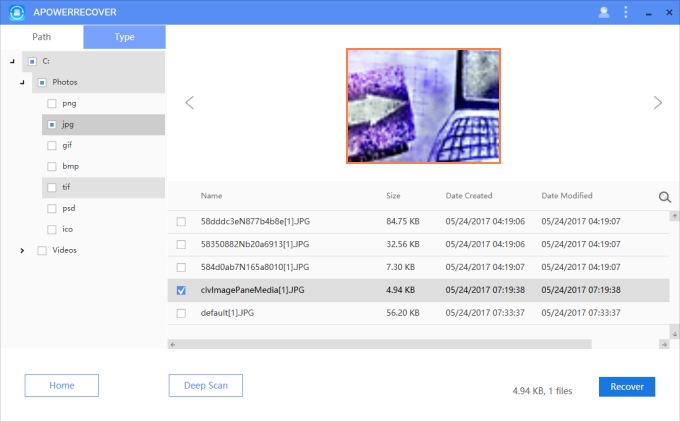
Preview the File
When scanning completes, the files will be categorized into different folders according to their path and types. These folders will be displayed on the left side of the program. On the right side, all the files detected will be listed with detailed information, including name, size, date created, and date modified. If you do not know whether the file you have selected is the one you need, you can click it and the available preview will be shown above the data information field.
Restore Data
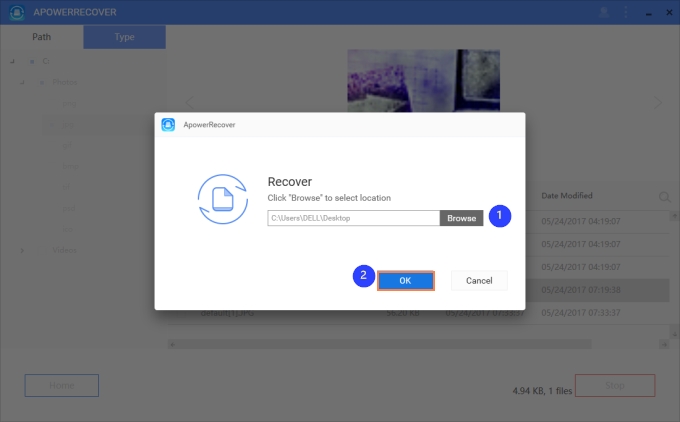
As mentioned above, the data is sorted into different categories, so you can check specific folders, click “Recover” and then “Browse”, and save the restored data to a specific location. Also, you can select the files to recover after previewing.
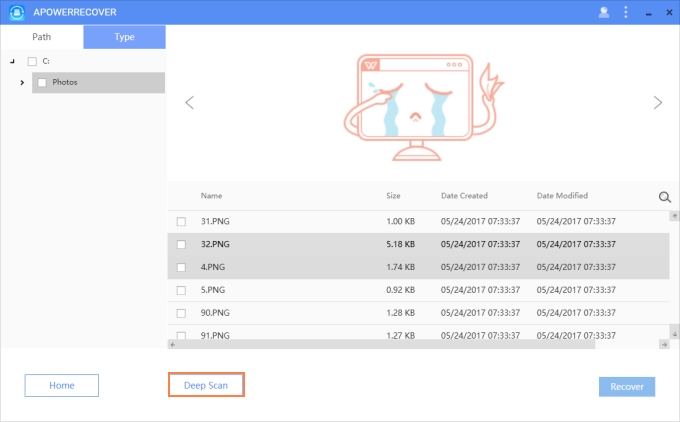
If you don’t find the file you lost, you can click “Deep Scan” and the program will search more deeply for your data. Once done, choose the files and get them back.
Tip: Recovering process can also be stopped by clicking “Stop” and then “OK”.
Now you know how to use ApowerRecover, if you face any problem or have any question about this product, please feel free to contact us.
Leave a Comment